MacOS
约 1201 个字 89 行代码 预计阅读时间 6 分钟
基础 
mac 默认使用 zsh
快捷键 
- 空格预览文件
- 按住 Command+ 空格,打开“聚焦“
- fn+backspace = del
- command+q 退出应用程序
- command + [ 返回上一级
- command + ] 前往下一级
- command + control + 空格 : emoji
- shift + option + b:颜文字
- 使用声调打字:tab
open .
触控板 
两指左滑 - 通知中心
文件管理 
小技巧 
同时重命名多个文件 - 拆字法打字
软件配置指南 
鼠标反转: 自然滚动去掉
软件已损坏?怎么解决 
sudo spctl --master-disable
xattr -cr /Applications/xxx.app
homebrew
首先需要配置好 vpn
/bin/bash -c "$(curl -fsSL https://raw.githubusercontent.com/Homebrew/install/HEAD/install.sh)"
echo >> /Users/philfan/.zprofile
echo 'eval "$(/opt/homebrew/bin/brew shellenv)"' >> /Users/philfan/.zprofile
eval "$(/opt/homebrew/bin/brew shellenv)"
brew help
cli 工具 
brew install wget
vscode
ctl + ~ 打开终端 : 注意是英文状态下面
Shift + Command + P 打开设置,输入 shell command 找到Shell Command: Install ‘code’ command in PATH
xcode
xcode-select --install
显示 command line tools are already installed
ssh
git
jenkins
brew install jenkins
paragon: NTFS 读写 
在使用硬盘传数据的时候,老是报错误代码 -50,搜了一下才发现 mac 原生是不支持 NTFS 文件系统的
什么是 NTFS
NTFS(New Technology File System)是由微软开发的一种文件系统,最早在 Windows NT 操作系统中引入。它是 Windows 系统的默认文件系统,用于存储和检索硬盘上的数据。
官网地址
Microsoft NTFS for Mac | Paragon Software
搜了一下发现希捷的官网有一个免费的版本
NVM
nvm-sh/nvm: Node Version Manager - POSIX-compliant bash script to manage multiple active node.js versions
wget -qO- https://raw.githubusercontent.com/nvm-sh/nvm/v0.40.2/install.sh | bash
export NVM_DIR="$([ -z "${XDG_CONFIG_HOME-}" ] && printf %s "${HOME}/.nvm" || printf %s "${XDG_CONFIG_HOME}/nvm")"
[ -s "$NVM_DIR/nvm.sh" ] && \. "$NVM_DIR/nvm.sh" --no-use # This loads nvm, without auto-using the default version
nvm -vx
node
使用 NVM 进行管理
nvm install stable
npm install -g tldr
npm install -g typescript
npm install -g @vue/cli
npm install -g vuepress
npm install -g @angular/cli
npm install -g eslint
npm install -g gitbook-cli
npm install -g lodash
creative cloud
201: 说明是网络问题
- PS
- AI
- Acrobat
- LR
picgo
Release 2.3.1 · Molunerfinn/PicGo
下载之后进行 dwg 的安装,因为 PicGo 没有签名,所以会被 macOS 的安全检查所拦下 , 安装后会显示已经损坏,这个时候需要根据 PicGo/FAQ.md 中的方法进行操作
sudo spctl --master-disable
xattr -cr /Applications/PicGo.app
docker
typora
jetbrains
ZJU 有企业账号,在校网环境下面登陆
wps
zju 有企业账号,SSO 登陆输入 ZJU,验证登陆即可
qq 音乐歌单导入 apple music 
- 获取 qq 音乐的歌单 id
- 通过 id 获取歌单曲目
- 通过 Tune My Music 向 apple music 导入歌单曲目
adobe 系列 
效率工具 
icloud 软件 + icloud 书签实现 edge 和 safari 的同步 
rt,在 windows 上下载 icloud 软件,安装后登录 icloud 账号,再在 edge 上下载 icloud 书签插件,安装后登录 icloud 账号,即可实现 edge 和 safari 的同步
Aifred:better 聚焦 
Mac 效率神器 Alfred 系列教程—Alfred 概述 - 知乎
Iterm2:更 nb 的终端 
设置启动热键
第一步:preference -> keys ->Create a Dedicated Hotkey Window 第二步骤:设置Hotkey,我设置和Linux差不多布局的command(Ctrl+Alt+T)
sh -c "$(wget https://raw.githubusercontent.com/ohmyzsh/ohmyzsh/master/tools/install.sh -O -)"
sh -c "$(curl -fsSL https://raw.githubusercontent.com/ohmyzsh/ohmyzsh/master/tools/install.sh)"
#编辑配置文件
vim ~/.zshrc

#在最后一行增加下面的代码
source /usr/local/share/zsh-syntax-highlighting/zsh-syntax-highlighting.zsh

#退出编辑后执行使配置生效
source ~/.zshrc
spectacle: 窗口移动 
Carthage/Carthage: A simple, decentralized dependency manager for Cocoa
brew install carthage
下载 release 即可,需要安装一个环境,按步骤来即可
Vanilla: 隐藏菜单栏 
按住 Command 键同时拖动应用图标 进入相应区域,就完成了对应用图标的隐藏 / 显示设置,这要比 Bartender 便捷高效许多。
Vanilla,精简 Mac 菜单栏应用图标,小巧轻量还免费丨 App+1 - 少数派
Scroll Reverser 调整滚轮方向 
Open in Terminal: finder 打开终端 
OpenInTerminal/Resources/README-Config.md at master · Ji4n1ng/OpenInTerminal
pluginkit -mAD -p com.apple.FinderSync -vvv
pluginkit -e "use" -u "C21A713E-0EED-4E97-8DB2-5B9EA96A1F28"
需要在访达上面自定义工具栏,然后添加 open in terminal
在软件里面也可以设置快捷键打开
safari 使用指南 
latex
brew install mactex --cask
等着就完事了
Apple Script
- 系统自带的“脚本编辑器”
- vscode 中
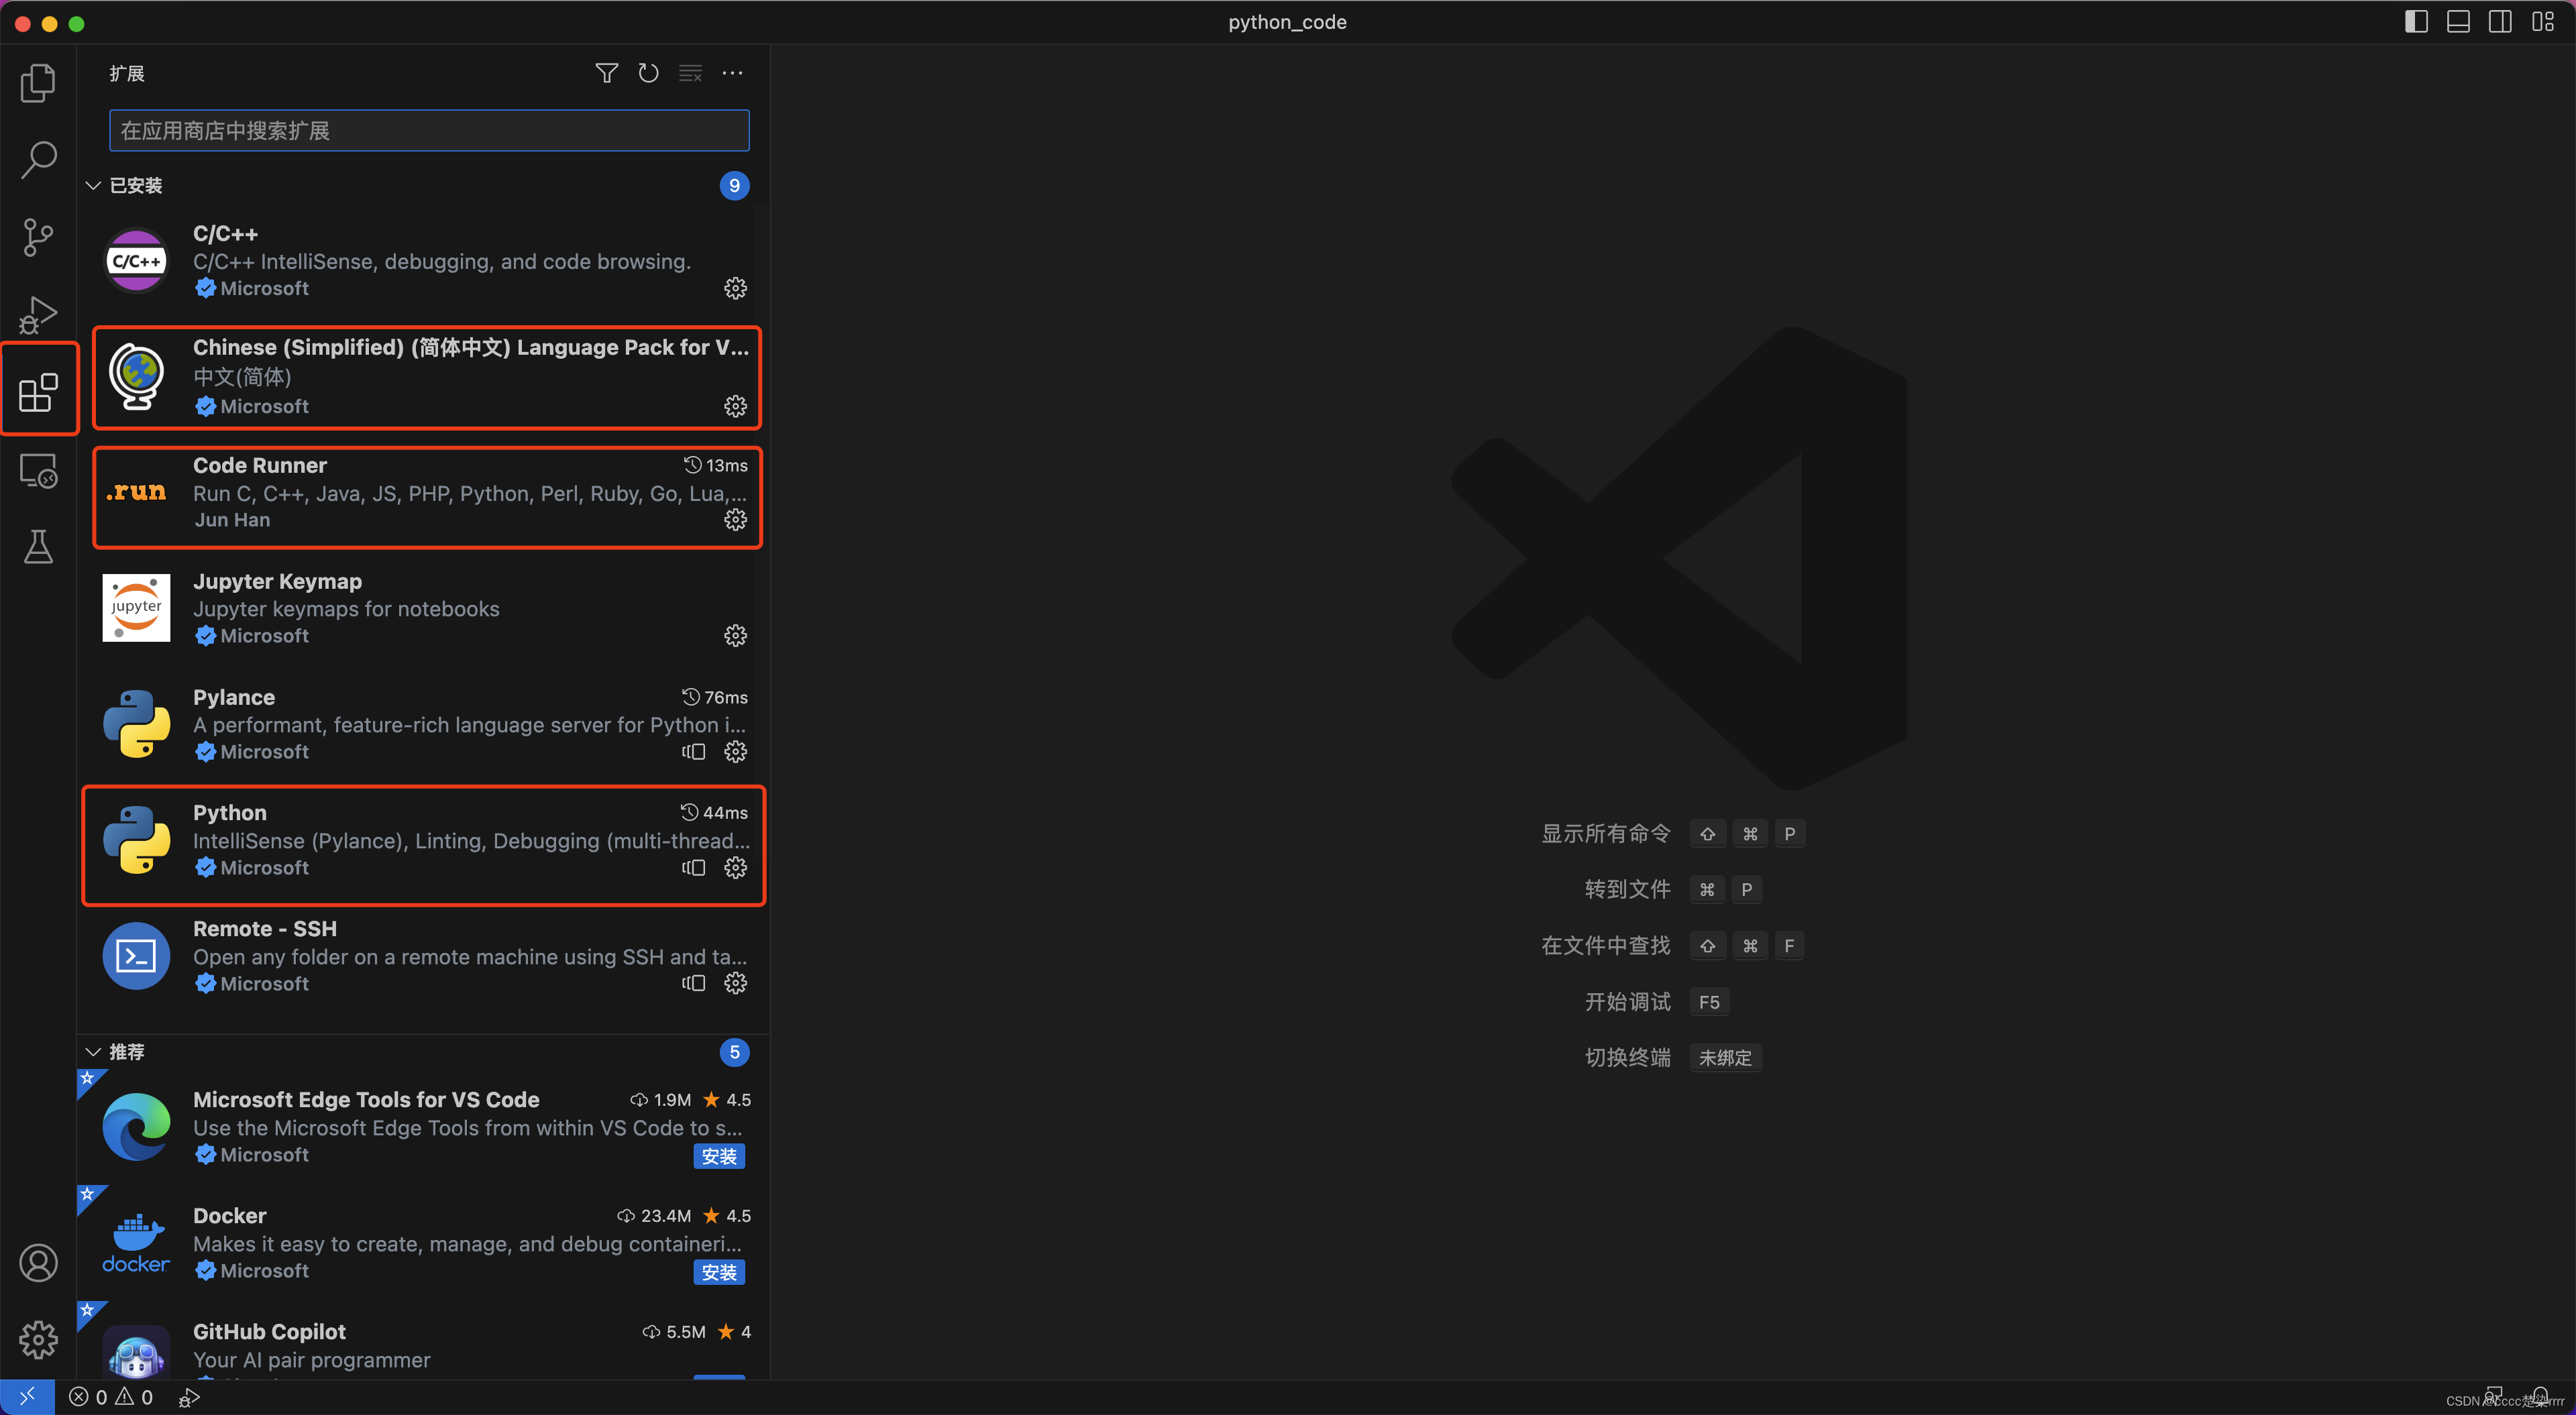
code runner插件
参考资料 AppleScript 入门:探索 macOS 自动化 - 少数派 kevin-funderburg/AppleScripts: My collection of AppleScripts I've developed or acquired over the years.
conda 环境 
Miniconda — Anaconda documentation miniconda下载 m1/m2 MAC OS m2安装和卸载miniconda - 知乎 安装
# 文件名是自己下载的sh文件,-p后面填安装路径
# -b 表示将环境变量自动写入到~/.bash文件中
sh Miniconda3-latest-MacOSX-arm64.sh -b -p ~/miniconda3
前往安装地址,打开终端
source /bin/activate
执行
conda init zsh #zsh执行这个命令
或者
conda init bash #bash执行这个命令
vim ~/.zshrc
export PATH=/yourpath/anaconda3/bin:$PATH
source ~/.zshrc
换 conda 源 
conda config --add channels https://mirrors.tuna.tsinghua.edu.cn/anaconda/cloud/conda-forge/
conda config --add channels https://mirrors.tuna.tsinghua.edu.cn/anaconda/pkgs/free/
conda config --add channels https://mirrors.tuna.tsinghua.edu.cn/anaconda/pkgs/main/
conda config --append channels https://mirrors.tuna.tsinghua.edu.cn/anaconda/cloud/fastai/
conda config --append channels https://mirrors.tuna.tsinghua.edu.cn/anaconda/cloud/pytorch/
conda config --append channels https://mirrors.tuna.tsinghua.edu.cn/anaconda/cloud/bioconda/

# 搜索时显示通道地址
conda config --set show_channel_urls yes
conda config --add channels https://mirrors.ustc.edu.cn/anaconda/pkgs/main/
conda config --add channels https://mirrors.ustc.edu.cn/anaconda/pkgs/free/
conda config --add channels https://mirrors.ustc.edu.cn/anaconda/cloud/conda-forge/
conda config --add channels https://mirrors.ustc.edu.cn/anaconda/cloud/msys2/
conda config --add channels https://mirrors.ustc.edu.cn/anaconda/cloud/bioconda/
conda config --add channels https://mirrors.ustc.edu.cn/anaconda/cloud/menpo/

conda config --set show_channel_urls yes
换 pip 源 
解决方案:将配置好国内源的pip.conf文件 , 放在 ~/Library/Application Support/pip 中。
可能有的新用户发现自己的文件夹中没有 pip 文件夹,不慌,新建就行!
command + 空格            #  打开聚焦搜索
输入 ~/Library/Application Support       # 找到Application Support文件夹
在Application Support这个文件夹里面建一个 pip 文件夹 ;
在新建的pip文件夹下建一个pip.conf文件。
在pip.conf文件中输入以下内容,保存并退出。
[global]
index-url = https://pypi.tuna.tsinghua.edu.cn/simple/
[install]
trusted-host=pypi.tuna.tsinghua.edu.cn
卸载 
(1)使用 Anaconda-Clean 包删除所有与 conda 相关的文件和目录
conda activate your_conda_env_name
conda install anaconda-clean
anaconda-clean # add `--yes` to avoid being prompted to delete each one

#注:如果这一步之行不成功,可以直接跳过
(2) 删除整个目录(直接删掉安装文件就可)
rm -rf ~/miniconda3
(3) 删除将 conda 路径添加到 PATH 环境变量的行(或者注释掉)
注:其实只之行第二步就可,后边这两步为了再次安装时,环境冲突,所以删干净
vi ~/.bashrc
# -> Search for conda and delete the lines containing it
# -> If you're not sure if the line belongs to conda, comment it instead of deleting it just to be safe
source ~/.bashrc
vi ~/.zshrc
# -> Search for conda and delete the lines containing it
# -> If you're not sure if the line belongs to conda, comment it instead of deleting it just to be safe
source ~/.zshrc
(4) 删除配置文件
rm -rf ~/.condarc
#注:自己找一下~/.conda 开头的文件,删掉
vscode 的 python 环境 
安装插件

F1 -> Python: Select Interpreter -> 选择你的环境
或者右下角有个环境选择,右键把选择编辑器勾上